

How to Adjust Bass String Height (Action): A Repair Tech's Step-by-Step Guide
String height, or "action," is one of the first things players want to tweak on their own instrument, and one of the easiest to get slightly wrong. In this guide, written from the repair bench at Geek IN Box in Japan, we explain what string height actually is, how to measure it accurately, how to adjust it at the bridge, and how it changes your sound. Everything here applies to both bass and guitar.
What Is String Height?
String height is the gap between the string and the fret. When a listing says "the action is 2.0 mm at the 12th fret," it means precisely this: at the 12th fret, the distance from the top of the fret to the underside of the string is 2.0 mm.
That one small number carries a lot. It affects how easy the instrument is to play, the character of the tone, and even how in-tune it feels.
How to Measure String Height Correctly
You cannot adjust what you cannot measure, so start here. The tool you need is a 15 cm (6 inch) steel rule, the standard ruler on every repair tech's bench.
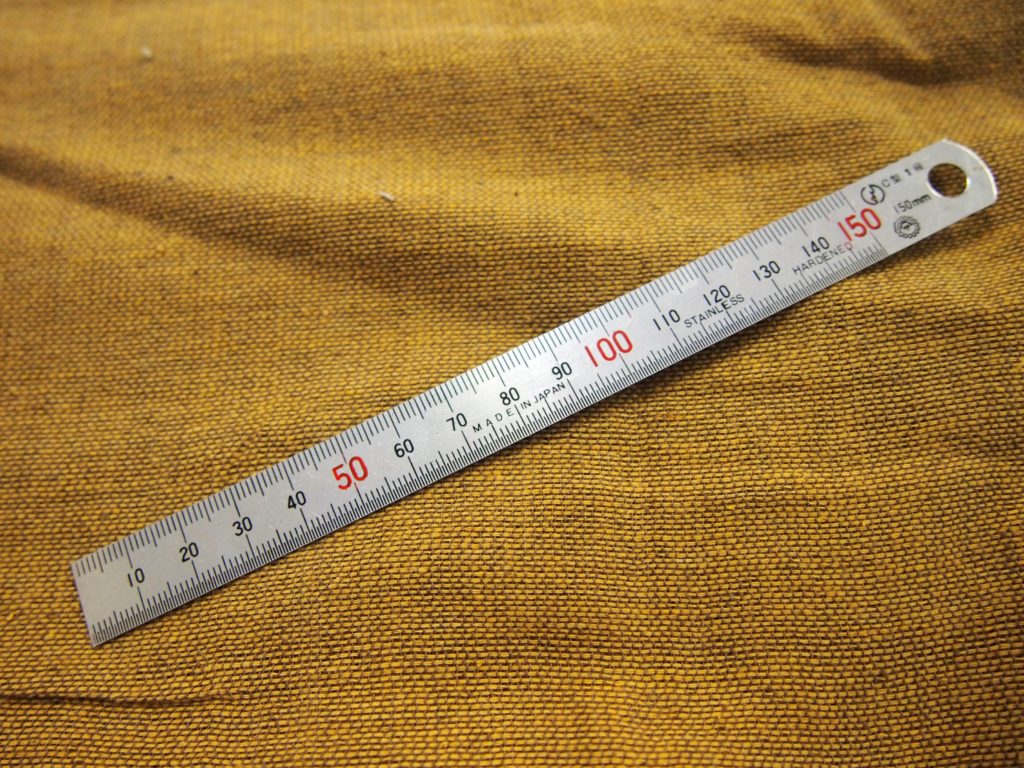
Stand the rule on top of the fret, parallel to the fingerboard and at a right angle to the string. If you are measuring at the 12th fret, the rule sits directly on the 12th fret. Then read the graduation that the underside of the string lines up with, and read the middle of that line, not its edge.

In the picture above, which one is 2 mm, A or B? The answer is A. In A the bottom of the string passes through the middle of the line. In B it passes the top edge of the line. The printed lines themselves have thickness, so this is the level of detail you need to work at.
A typical steel rule is graduated in 0.5 mm steps at its finest, yet a repair tech uses it to judge differences of around 0.1 mm by reading between the lines, quite literally.
- Lighting can throw a shadow exactly where you need to look. If it is hard to see, use your phone's flashlight.
- Keep this in mind when shopping, too: depending on how it was measured, a listed action figure can be off by as much as 0.5 mm.
Before You Touch the Bridge: Tuning and Neck Relief
There are two things to do before adjusting string height.
- Tune the instrument to the tuning you actually play in. If you play in drop tuning, set it up in drop tuning. If you play in standard, use standard.
- Set the neck relief. The ideal amount varies by player and by instrument, but there is a generally correct range, and the truss rod needs to be in it first.
Only then do you adjust the saddle height at the bridge, which is the actual string height adjustment.
How to Adjust String Height at the Bridge
Some bridges have elaborate mechanisms, but most work the same way. Here is the most common type.
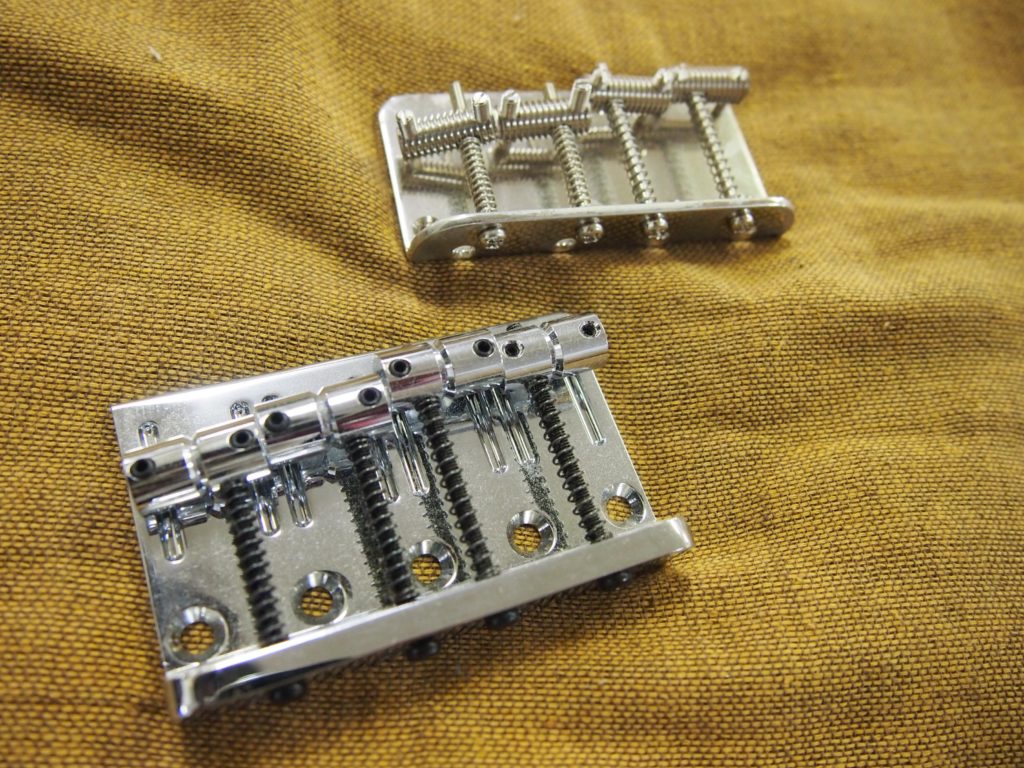
On the most common bridges you turn small set screws with a hex (Allen) key to raise or lower each saddle. Vintage-style bridges may use a flathead screwdriver instead. There are three points you must get right.
1. Use a wrench that fits exactly
If the key is even slightly the wrong size, the socket rounds out easily, and eventually the screw cannot be turned at all. Metric and imperial keys are close enough to fool you, so check the fit before applying force.
2. Keep the saddle level
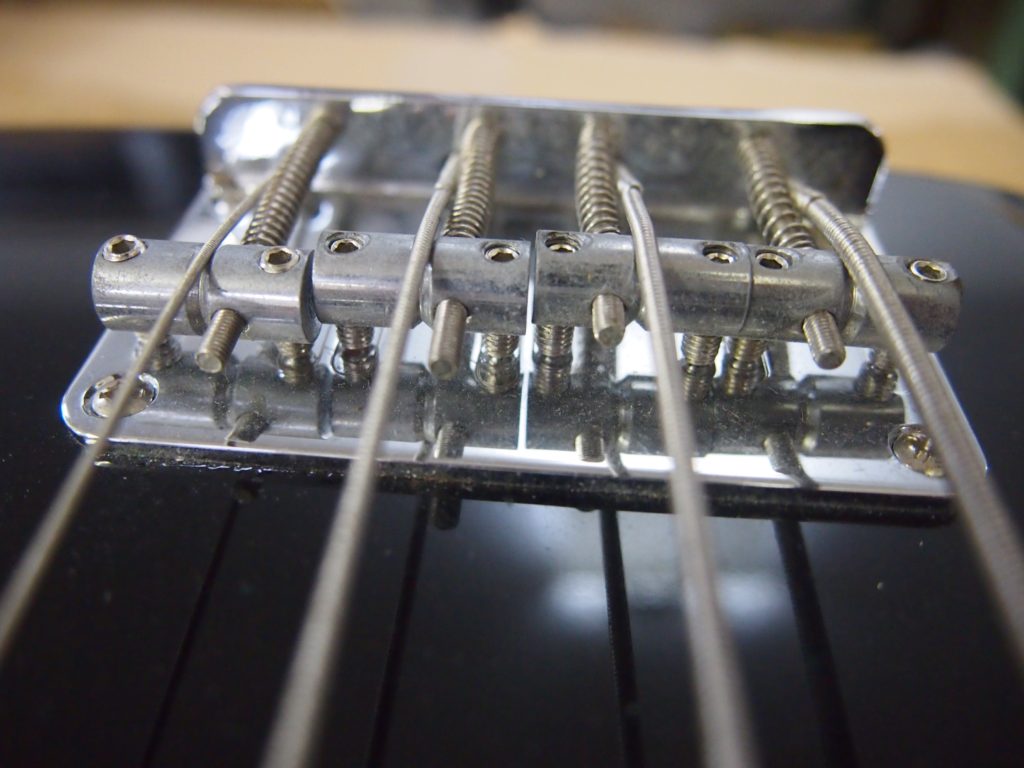
In this photo every saddle is sitting level. Now watch what happens when the A string is raised carelessly.
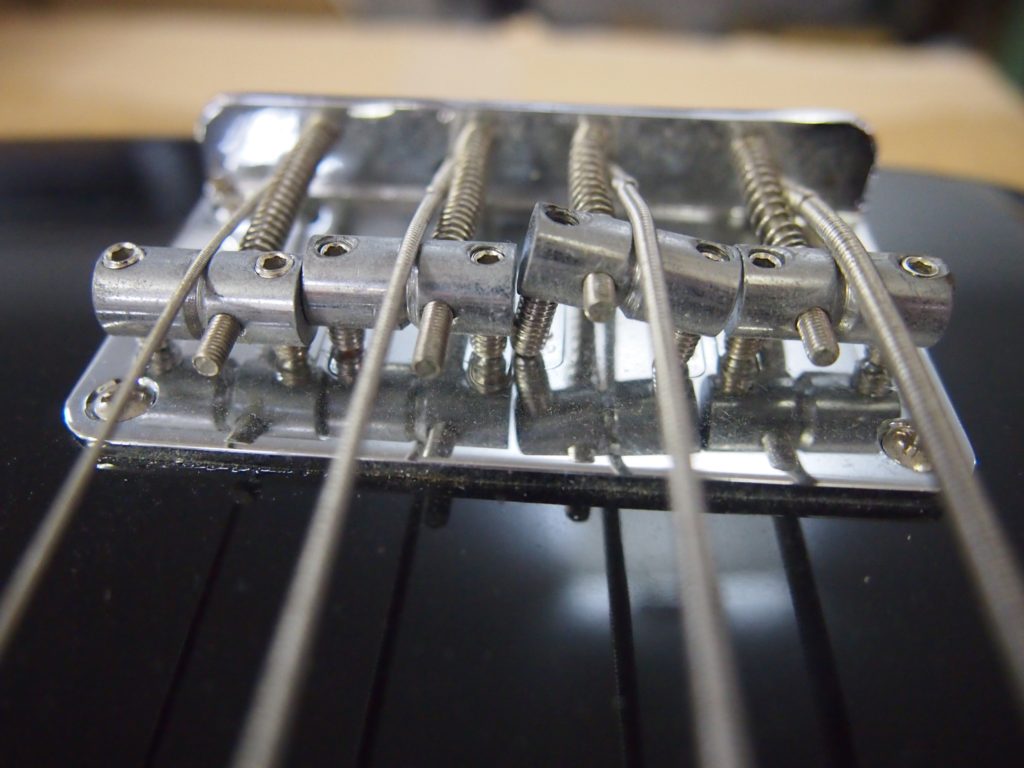
The saddle is tilted. Most saddles sit on two set screws, and if you turn only one of them the saddle leans over. As it looks, this is likely to waste string vibration, and it is not good for your peace of mind either. We see a surprising number of basses in this state after a do-it-yourself adjustment.
Saddles stay level. That is the iron rule: turn both screws by the same amount.
3. Retune before you measure
Whenever you change the string height, retune and only then put the rule on the fret. This is true of every adjustment on the instrument, not just action: always work at correct pitch.
How String Height Changes Your Tone
Action changes the sound, and the reasons are quite logical. Raising the string height changes four things on the instrument:
- The height of the saddle
- The angle of the string from the ball end up to the saddle
- The distance between the string and the pickup
- The distance between the string and the fret
Number 3 can be corrected afterward by resetting the pickup height. The other three depend entirely on the action. As the saddle rises and the break angle changes, more of the string's tension is directed down into the body.
The string-to-fret distance matters as well. With 2 mm of action, fretting a note bends the string by 2 mm, in effect a tiny string bend every time you play. So string height changes your sense of pitch and the stress on the string.
Put simply:
- Lower action gives a sharper sound with richer overtones.
- Higher action gives a stronger fundamental and a rounder tone.
After any change to string height, always finish by resetting the pickup height and then the intonation.
Summary
Setting string height means balancing playability, tone, the condition of the instrument and the habits of the player, then finding the point that serves them all best. Measure carefully, keep the saddles level, retune at every step, and you can do it yourself.
Every bass we sell is set up by our in-house repair team before it ships. Browse the basses currently in stock at Geek IN Box.


